Foolkit Paper Toy
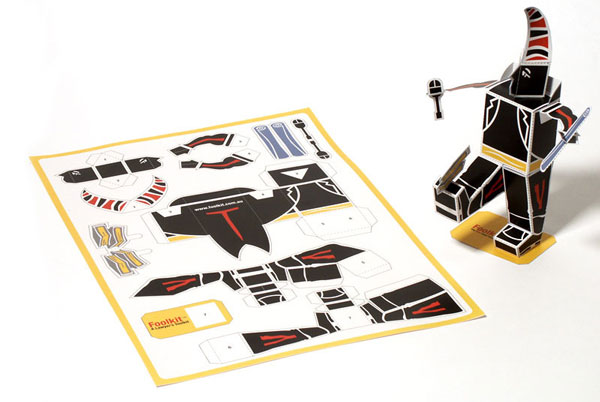
Make your own paper toy
The Fool is our logo. It takes less time than a lecture (or less than eight units of time) to assemble.
Download PDF Now
Instructions
- Print in colour. You can make it on ordinary typing paper. For best results use a heavier paper. We printed on 180gsm in gloss.
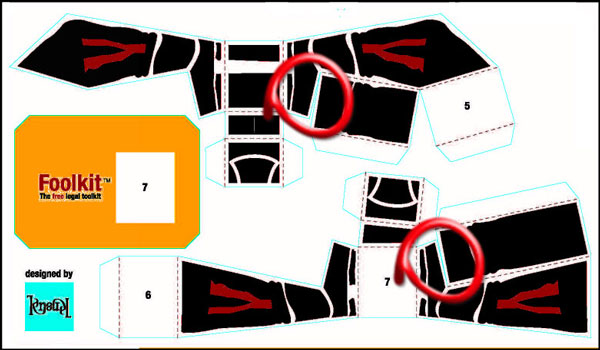
- Make the cuts on the hands and right foot with a sharp knife such as a craft knife.
- Cut along the blue cutting lines with scissors or a sharp knife.
- A couple of the less obvious cuts are:
- Crease along all folding lines ------ using the back of a finger nail, side of a pen or other hard smooth surface.
- Glue the head, body, legs and double faced parts separately.
- Any paper glue is fine. The designer recommended using double sided tape. We prefer Scotch Quick-Dry Adhesive. (We got ours from Office Works). No mess and you can adjust the join for a few moments before it starts to dry.
- Glue the tips of the hat.
- Assemble all parts and glue together using the matching numbers on the body.
- Insert the mouse and roll of paper into the hands. Sometimes you need to trim the width of the roll of paper.
- Inser the books into the right foot.
- The Fool should balance nicely on one foot. If he is leaning over, then bend the base slightly to straighten him up.
Pre-Printed Fools
- We have printed off a limited number of Fools for universities, schools and libraries.
- Contact us with numbers and we'll let you know our stock situation.
